Get a Redbubble Toolbar

toolbar powered by Conduit

Sunday, November 9, 2008

Using Tags on redbubble

Using tags on Redbubble
There are many reasons for using tags
  1. Creating links to make it easier for your visitors to find what they want
  2. Knowing what images are in what group
  3. Help your visitors find what they want faster.
For keeping track of what images are in what group, I've found that the easiest way to do this is by Tagging the image with the group name. Then making a bookmark for easy access to Group lists, This method will also show new images as long as you add the tag when you enter the image to a group.
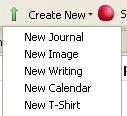
To add tags to images Click your "art" button or "Here" , Then next to the image click "edit", The tag box is below the Description box.
Tag Example: All images that I've submitted to the Group "Animal Kingdom" , I've added the following tag "animal_kingdom"
Search Example:The following will work for all users as long as you put your username, and tag in the places indicated in red- http://www.redbubble.com/people/yourusername/art/everything/tags/tagname
Once you get the results Bookmark it, Now the next time you try to remember what images you have in a group or have I reached the group limit you can click the bookmark and see what images are in that group and how many.
Bonus: Using the links from above to organize your images for visitors, Link an Image or text with the Links you created above (if your not sure how to do this See this post "How to customize Redbubble")
Linked text Example: "Landscapes":http://www.redbubble.com/people/yourusername/art/everything/tags/tagname
Linked image Example: !www.imageishere.jpg!:http://www.redbubble.com/people/yourusername/art/everything/tags/tagname

You can click the link below, It will open in redbubble it won't give you any results but then you can then change the username
in the address bar click "go" or just hit enter bookmark the result for future tag making .
http://www.redbubble.com/people/yourusername/art/everything/tags/tagname

How to tag your journals / writings
The above method does not work for my journls or writings
Example:I have a few How-to's in the "How to Redbubble" group and I've tagged them with"htrb" So if i create a tag like above it would be
http://www.redbubble.com/people/envelope150/art/everything/tags/htrb
unfortunately the results give me a blank page (click the link above if you don't believe me)
Here is how we can get the results we need (want).
See Here http://www.redbubble.com/search/envelope150%20htrb/journals
If you have a lot of writings it might be a good idea to tag these for many reasons.
  • Fist and most important tag all your work with your username
  1. Keeping track of what groups they are in
  2. Easy reference for other bubble members
  3. sorting by topic
  4. and many more....
I will try and explain the easiest way to do this and hopefully make it as painless as possible.
I will explain how I created the above results for my How to journals
Step 1. Tag the journal I'm using "htrb"
Step2. Make a link to the list of journals with this tag
To do this we will need to use the search box
Enter your username and tag "click Search" I'm going to enter envelope150 htrb
Step 4. When you get to the results page copy the address from the address bar or bookmark it.
If your tags are fresh give it a little time for redbubble servers to catch up(up to 10-min)
Now you can use the address to make links to your journals for easy reference or group tracking.
I high lighted my username and tag below in red, When copying the results you will have the %20 where the space is suppose to be.
Using the method above to create links for your images adds the ability to use more than one tag
Example: If I want to make a link to my osprey(bird) images I would use the search box and enter envelope150 bird osprey click "search" and I get this
http://www.redbubble.com/search/envelope150%20birds%20osprey only my images that include the 3 tags will show up
This method would be good for the Flower Lovers to separate their Flowers images not only by type of flower but color as well. Using tags like username flowers roses red and then searching those tags to make a link to their "My Red Roses Collection".
Hope this tutorial helps in getting you started in fully customizing or just organizing your bubble profile.
Happy Bubbling
Dan

Monday, November 3, 2008

Slideshow in your redbubble profile/bubblesite

Adding a slide show to redbubble
Ok not really a slide show but it is very close, It's an animated gif image.
You can see it on "My Bubblesite"
Doing this will require you to have software that can make an animated gif image.
And of coarse I know of a free software program that can be used and this tutorial will explain how to do this using this free software.

The free software is called
unfreeze and you can "Get it here"
Once downloaded and installed on your
computer we are ready to go.


The first step is to get the images you want to include in your slide show, I am going to use my redbubble images set in frames for my bubblesite homepage.
  • Sign-in to your redbubble account
  • Click "My Bubble"
  • then "Art"
  • find the image you want to include and click the "show public view"
  • Now click the "buy/preview" button
  • Select the product format you want to use Card, Laminated print, etc..
  • Then save the image to your computer.
Internet Explorer users "Right Click" the image and select "Save Picture As"
Firefox users "Right Click" and select "Save image as"
And choose a location on your PC where you can find it easily.
You can use as many images as you want, but remember you want them to visit your gallery so keep the number of images to a minimum.
I'm going to use 8 images for now.
You can re size your images if you like the Unfreeze software will resize your images to fit in a 375 pixels(high) X 360 pixels(wide) box but the software will not center the image. For those that want their images centered in the box, Use your photo software to edit the images
The software program (unfreeze) that I recommended above requires the images to be in gif format. Doing this in your photo software may be different than mine. But I will open the image in my photo software "Paint.net" and then click the "Save as" option and change the format (type) to gif ( Graphics Interchange Format).They will be saved in the same folder that I put the ones I downloaded from the bubble.

Once the images are in the gif format. We are ready to create the animated gif (slideshow)
  • Open the folder where your gif images are located
  • Start "unfreeze" a small window will appear


  • Drag your images into the white window
  • Then set the delay on the right, I used 90, Make sure the "Loop animation" box is checked
  • Now click the "Make Animated Gif" button
  • Give it a name and Click "Save"
  • If you want it to change slower add the same image two times or three or even more if you like.
The image that I created here was made using three copies of the same image,delay set to 90
Example: drag and drop "image1.gif",then do it again drag and drop "image1.gif "


Now the image can be uploaded to a web site, since Redbubble does not support this file type. You can use "Dropbox" which is a free file store, share, sync software "Get it Here" it allows you to have 2 gig of file storage for free. Plus when I change the slide show gif I just created dropbox will take care of the rest.
So changing my slide show is as easy as making a new one and saving it using the same location and name on my pc as the one I'm using now.
Insert the new image on your bubblesite or profile
Use the image location (web address,web url) with a ! before and after the image location
For more on Linking images etc. see this post "How to Customize Redbubble"
And your done.
This can also be used to promote your Calendars
( I used 6 cover images, 4 of each month, 6 back images delay set to 60 )


Happy Bubbling
Dan

Thursday, October 30, 2008

redbubble toolbar

redbubble toolbar
"Get it Here"
I've found that the easiest way to navigate on redbubble was to create my own tool bar with links and shortcuts to the things that I do on the bubble. I've added many new options and shortcuts. It works with Internet Explorer and Firefox
I hope you find this toolbar as useful as I have.


View Challenges in your groups
View all that are open for entries
View all that are Voting
and View all Closed Challenges


Quick links to all you work
Not shown here but now has a link to "Bulk edit"


The send to button will allow you to share not only your redbubble images. But any web page on the web.


So that pretty much sums up what the toolbar can do there are many more features that can be turned on/off by going to the toolbar options on the toolbar you can add "Local Weather" "notepad" and many more. So if your ready to install this toolbar "Click Here"
Happy Bubbling
Dan

Saturday, October 18, 2008

Add a visitor counter to your Profile or bubblesite

Adding a visitor counter to you profile or bubble site
I have one on my Bubble Page I got it from http://www.digits.com
Go to digits.com and create your web counter, They will e-mail you your information
it will look similar to below
Please note that all web counters have their own web counter numbers and You must link to their web site using one of their images
The text in the above image in red is what you will use to make the counter
First the image location
http://counter.digits.com/?counter={the counter id numbers}&template=simple
It must be linked to their web site or it will stop working
So it will look like below
!http://counter.digits.com/?counter={the counter id numbers}&template=simple!:http//www.digits.com
Remember no Spaces between the !
Don't forget to link to their website with one of their images or it will stop working
Make the counter invisible To visitors by adding the color code that matches the theme color
like below (Blue text)
!http://counter.digits.com/?counter={the counter id numbers}&template=simple&foreground=oooooo!:http//www.digits.com
Color codes for black add &forground=000000
for white add &forground=ffffff
and for grey add &forground=cccccc

Happy Bubbling
Dan

Tuesday, September 9, 2008

Creating Thumbnails for grouping images

Using thumbnails to Organize images by Groups
This how-to will show you how to Create Thumbnails to use as preview link to Grouped images on redbubble. First thing we need is an image I'll use one from my redbubble gallery. "Click Here" if you do not know how to do this.

Now to add some text to it I'll use Photo software, since most software has different methods I won't go into to much detail on how to do this. The important thing to remember is that, Where the image is going to go is only 420 pixels wide so if you plan on using more than one image side by side make them no larger than 200 pixels wide each. I use (at the time of this post) images that are 190 X 190 pixels. I'll make the one above the same.

The image I saved from redbubble (above) is 375 pixels wide X 300 pixels high. Since the image is not square(375x300). We want to re-size the canvas to make it square(375x375)I've added a red background to the image below for display purposes

Optional: Now fill the background with your preferred color ( I'll use black)

Now re-size the image to 190 x 190 pixels

Now Add Your text

The new image can be uploaded to your redbubble profile, Make sure to set the options as I did below so it does not make it's way into your fine Gallery of images

Now you can use this image to link your images by group.
To group your images with tags see "Here"
To link your New Photo to the tags see "Here"
Example Photo link on redbubble would look like
!http://www.mypicture is here.jpg!:http://www.your going here.com

Wednesday, August 20, 2008

Redbubble tool bar

Redbubble Toolbar

Forgive the out dated pictures I've added a lot of new links etc. Will update soon
I created a tool bar to navigate redbubble, I'm currently adding and up dating it as I go, But this toolbar will update itself so if all the Bubblians are using it and I change it, Everyone's will change to makes sharing it more fun and, Hopefully I'll get some feed back on how to make it better.Cause it will make tasks on the bubble faster.Enough said here is what I got so far.
Clicking the Plus Button will give you the menu below
This is where the current group bars are located You can Change them to you favorite group(It will notify you when new Group bars when available) The edit button will allow to keep control of this list by adding or deleting.More about group bars later.


The down arrow next to redbubble logo will open a menu of options notice the "Suggestions by bubblemail" link contact me with suggestions. The options are pretty much self explanatory the "Toolbar options" will open a new box with many features to make the bar work for you.


Below are the options that can be enabled or disabled.


Shortcuts to some software can be found on this menu (I use Note Pad alot)


Creating new works are
all gathered in one place


Usefull site links can be found under the "Site links" Button

The "My feed links" Contain the other buttons that are very handy to have Quick access to


And that is what I've got for the Redbubble toolbar see my next post for the group bar.

Tuesday, August 12, 2008

How to Customize Redbubble

How to Customize Redbubble
This how to will explain how to create that Custom Redbubble Profile you've always wanted.
These methods will work on your Profile Page,Description Box,Forums and Bubblesite (Home Page content & About Page content boxes) any redbubble text box

Working with text Use the below symbols with no spaces
Place the symbols before and after the text
Example: +envelope150+ will be envelope150
  • symbol # =creates a larger font header only (First line of text)
  • For a new Paragraph press enter twice
  • symbol * = bolds
  • symbol _ = italic
  • symbol ^ = small upper
  • symbol – = creates grey text
  • symbol ~ = makes text smaller
  • symbol + = Underlines the text
  • symbols * * * = Will make a simple line across your page (Journal entries only)
  • symbol # = · bullet text
You can make your text clickable or link to a web address

Put quotation symbols ” ” on each side of the word/sentence you want to make Clickable and then a Colon : (no spaces), Now put the url (web address) where you want the clicker to go

It will look similar to below

"View My Gallery":http//example.redbubble.com

You can also make a Text box appear when hovering over the link by adding text in brackets

Like this "View My Gallery(Go to My Gallery)":http//example.redbubble.com

The text above in ( ) will appear in a box if someone hovers over the link

Here is how you can create a contact link or e-mail me link

Example: "contact me":mailto:me@myemail.com

Using images in your descriptions ,profile page,etc

First you must know where the image is located (web address)

Example: http://www.mypicture is here.jpg

To use an image from redbubble click the "show public view" in your "Art" section

then click the "Buy/Preview" Button

Set the image as you wish to use it, Card, Framed print etc...once you are done follow the instructions below to get the web address

If using firefox simply right click the image and select "copy image location"


Using Internet explorer right click the image then select "Properties"
A Properties box will appear copy the Address(URL) High lighted in blue below
by Highlighting the text then "right click" and choose "copy"
or once it is hightlighted hold the "control(CTRL)" key and press "C"

Using Safari select "Copy image address"


You can now paste the image location(right click and select "paste" or hold the Control key and press "V" on your key board) Now put a ! before an after the image location (No Spaces) like this !http://www.mypicture is here.jpg!
To make it clickable or linked add the colon : and web address
:http://www.your going here.com

The final entry Will look like below (No Spaces)
!http://www.mypicture is here.jpg!:http://www.your going here.com


Happy Bubbling
Dan